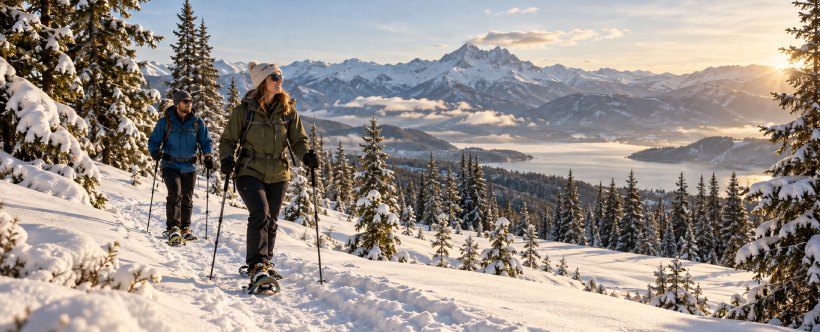
Winter adventures don’t need to involve costly equipment, ski passes, or hours of training. Snowshoeing offers a simple way to enjoy snowy landscapes while getting some exercise in the fresh air. If you can walk comfortably, you can usually learn the basics of snowshoeing within minutes. Many outdoor equipment shops offer affordable rentals, making it easy to try the activity without buying your own gear. This guide explains how to prepare for your first trip, choose suitable trails, dress for the conditions, and stay safe along the way.
Why Snowshoeing Is a Great First Winter Sport
Most winter sports demand lessons, expensive gear, and a decent tolerance for falling down. Snowshoeing asks almost none of that. Strap on a pair and you’re moving – no technique required beyond knowing how to walk.
Rentals at most ski resorts and outdoor shops run around $20–$30 a day, making it one of the most affordable ways to get outside in winter.
What Snowshoes Do
The wide frame spreads your body weight across a larger surface area. That’s flotation – it keeps you on top of soft snow rather than sinking through it with every step.
Where Beginners Should Start
Packed trails in local parks, golf courses open to winter use, and flat recreation paths are ideal. Look for routes under 500 feet of elevation gain to start.
What to Wear and What Gear to Bring
Getting dressed right matters more than most beginners expect. The right layers keep you warm and dry; the wrong ones leave you cold and miserable by hour one. Here’s how to set yourself up properly.
Layering for Warmth and Dryness
Dress in layers to stay comfortable as temperatures and activity levels change. Choose a base layer made from merino wool or moisture-wicking fabric, followed by a fleece or another warm insulating layer. A waterproof jacket provides protection against snow and wind. Select insulated winter boots that fit properly into your snowshoe bindings, and consider gaiters to prevent snow from entering. Complete your outfit with gloves, a winter hat, UV-protective sunglasses, and sunscreen.
Essential Gear
Poles help with balance and rhythm on uneven terrain – adjustable trekking poles are ideal. Bring water and snacks too. Renting snowshoes for your first trip makes sense; most outfitters include poles and explain traction systems on the spot.
How to Move Well and Stay Safe on the Trail
Good technique makes snowshoeing feel natural within minutes. A few small adjustments to how you walk and where you place your feet will save energy and keep you steady all day.
Basic Walking Technique
Widen your stance slightly more than a normal walk – just enough to avoid stepping on the frame of the opposite snowshoe. Take shorter steps than usual. Poles help with balance from the first stride, so plant them with each step rather than letting them drag.
Going Uphill, Downhill, and Across Slopes
When heading uphill, press the front of each snowshoe firmly into the snow while shifting your upper body slightly forward. For downhill sections, bend your knees and move your weight toward your heels to maintain balance. When traveling across an incline, known as traversing, use the uphill edges of your snowshoes to gain traction and prevent slipping.
Start Small and Enjoy the Snow
Every rewarding first trip starts with a simple decision: keep it easy. Choose a flat, well-marked trail, dress in moisture-wicking base layers with a warm mid-layer on top, and bring the basics – water, snacks, and trekking poles for balance. Focus on a steady, slightly wider stride and let the snowshoes do the work. Avoid steep or unfamiliar terrain until you have a few outings under your belt, and always check conditions before heading out. There’s no denying that winter trails carry real hazards, so respect them from the start. Rent a pair of snowshoes at a local outfitter, find a beginner-friendly trail nearby, or join a guided group outing – then go enjoy the quiet.